Menu 5
Photos & Videos
Browse the public church gallery or post approved media through three sources: Photos, Files, or a public cloud-share URL.
Browse the gallery
- Tap Photos & Videos in the bottom bar, or open three-line menu → Media → Church Photos & Videos.
- Choose the general gallery or an event gallery such as 2026 JBS or 2026 SBS, then filter by event, photo/video type, or tag.
- Change the column count, then tap an item for full-screen viewing.
- Pinch a photo to zoom and pan with one finger. Move between adjacent items and use Share.
- For video, use play/pause and sound controls; picture-in-picture is available on supported devices.
Start an upload
- Sign in as User or above under Settings → Account.
- Open the correct general or event gallery and tap Upload.
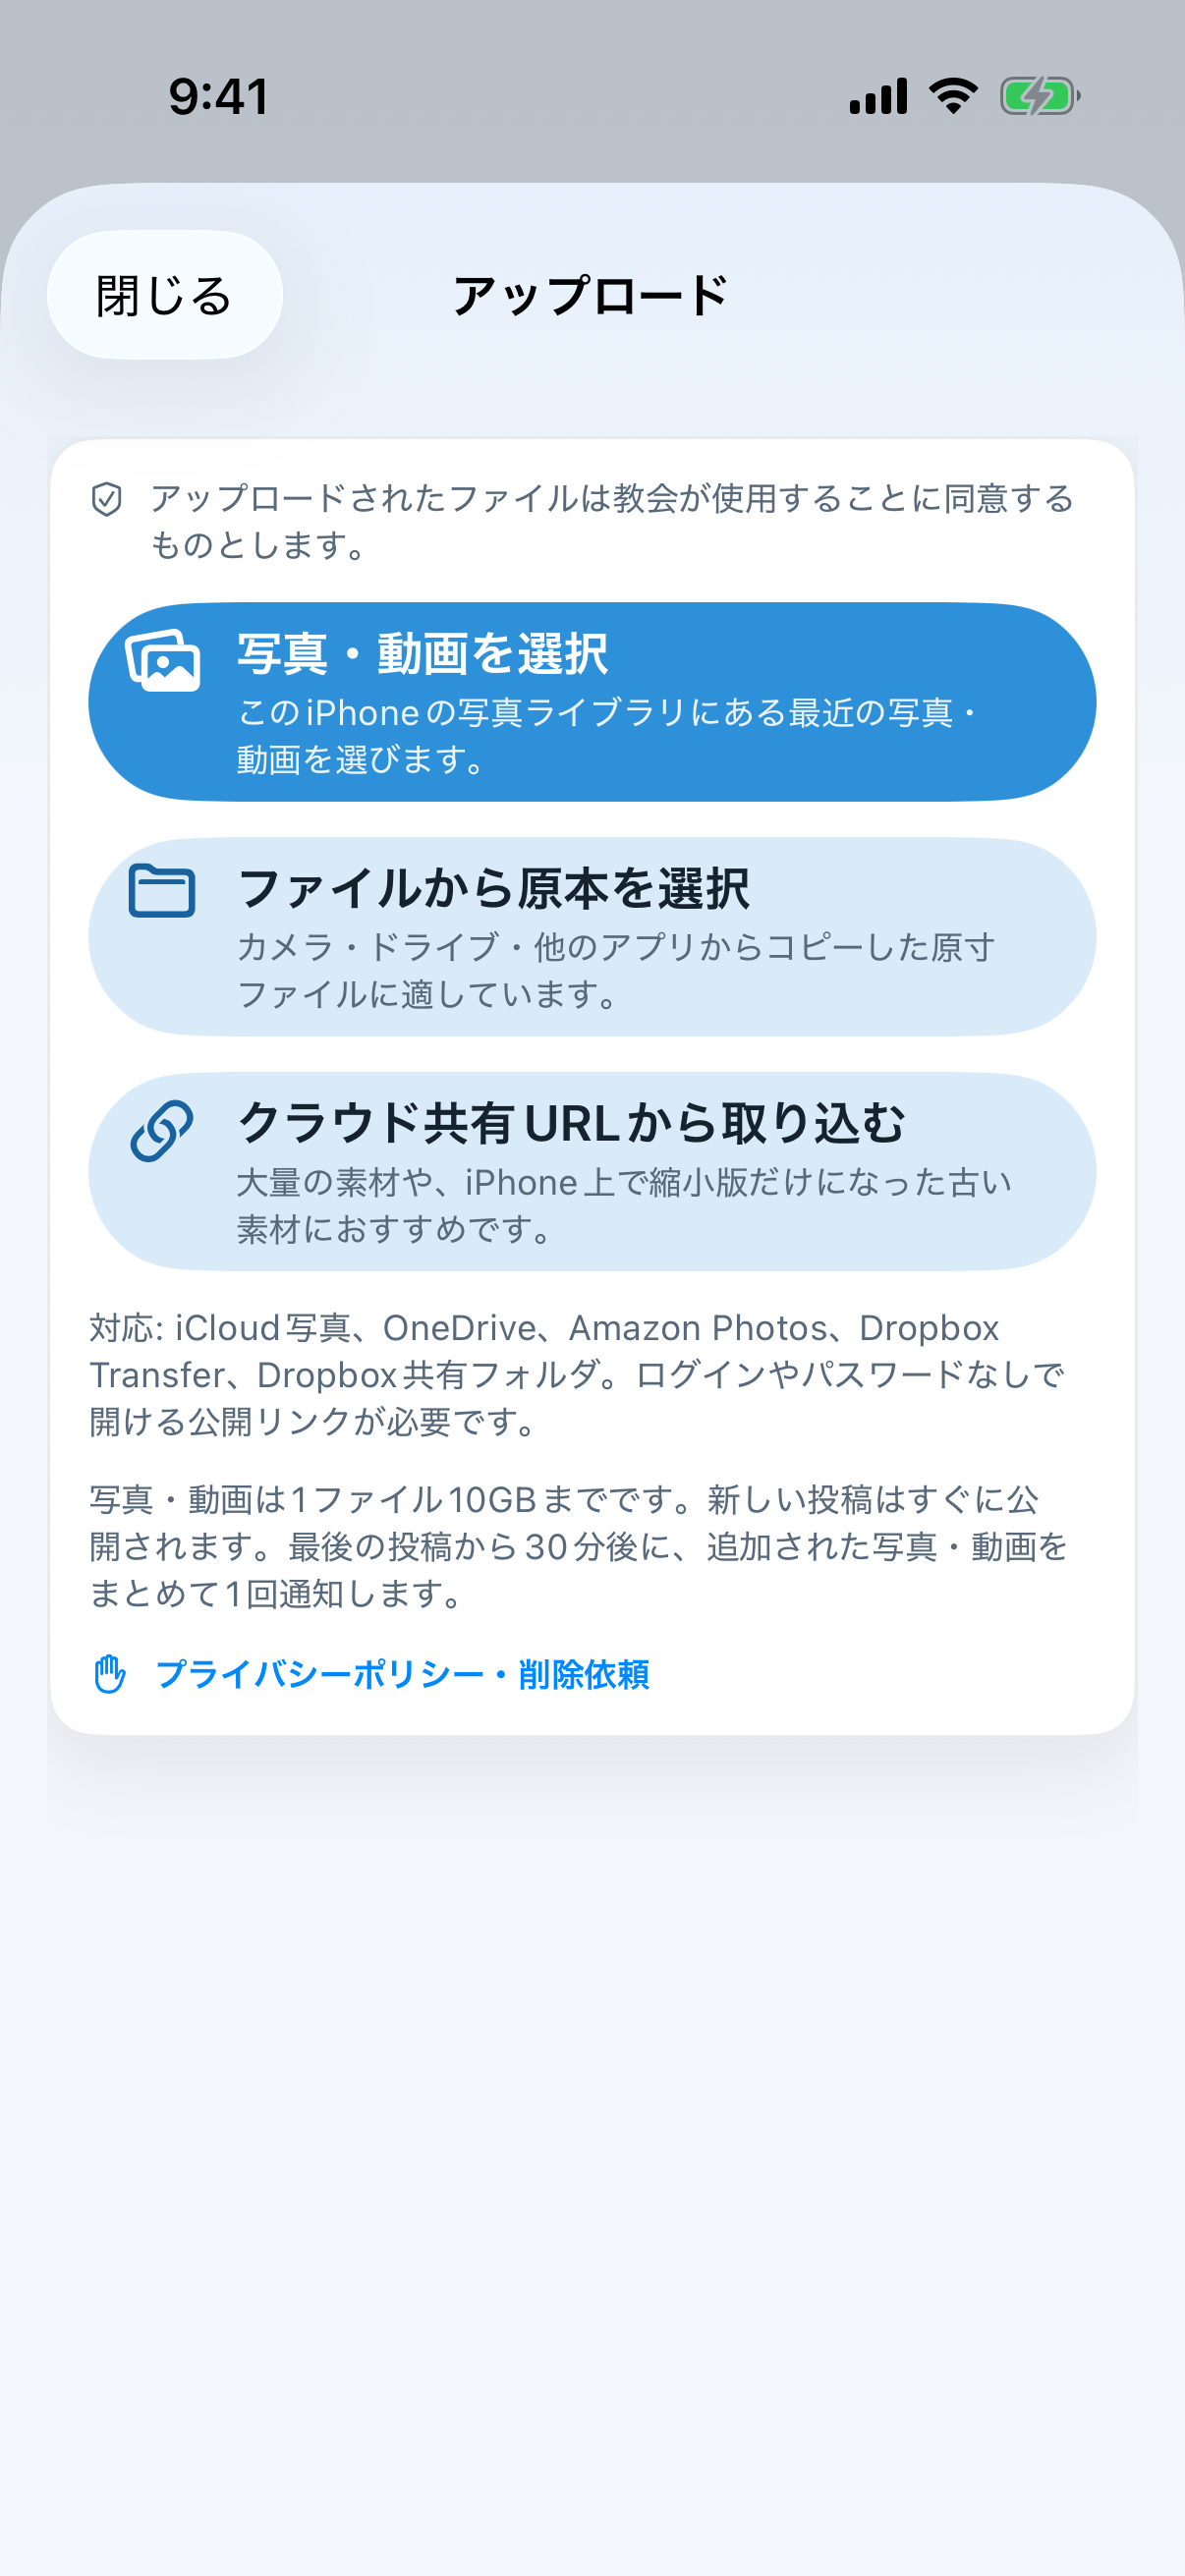
- Read the publication and church-use consent notice. Continue only when every selected item is approved.
- Select Photos or Videos is for recent items in the iPhone Photos library; Choose Original Files is for full-size material saved to Files from a camera, drive, or another app; Cloud Share URL is recommended for large collections or older media.
- Posting from an event gallery automatically applies the 2026JBS or 2026SBS event tag.
- Review and start. Each new item is published when it finishes; one summary notification is sent 30 minutes after the last new upload.
Cloud Import from a URL
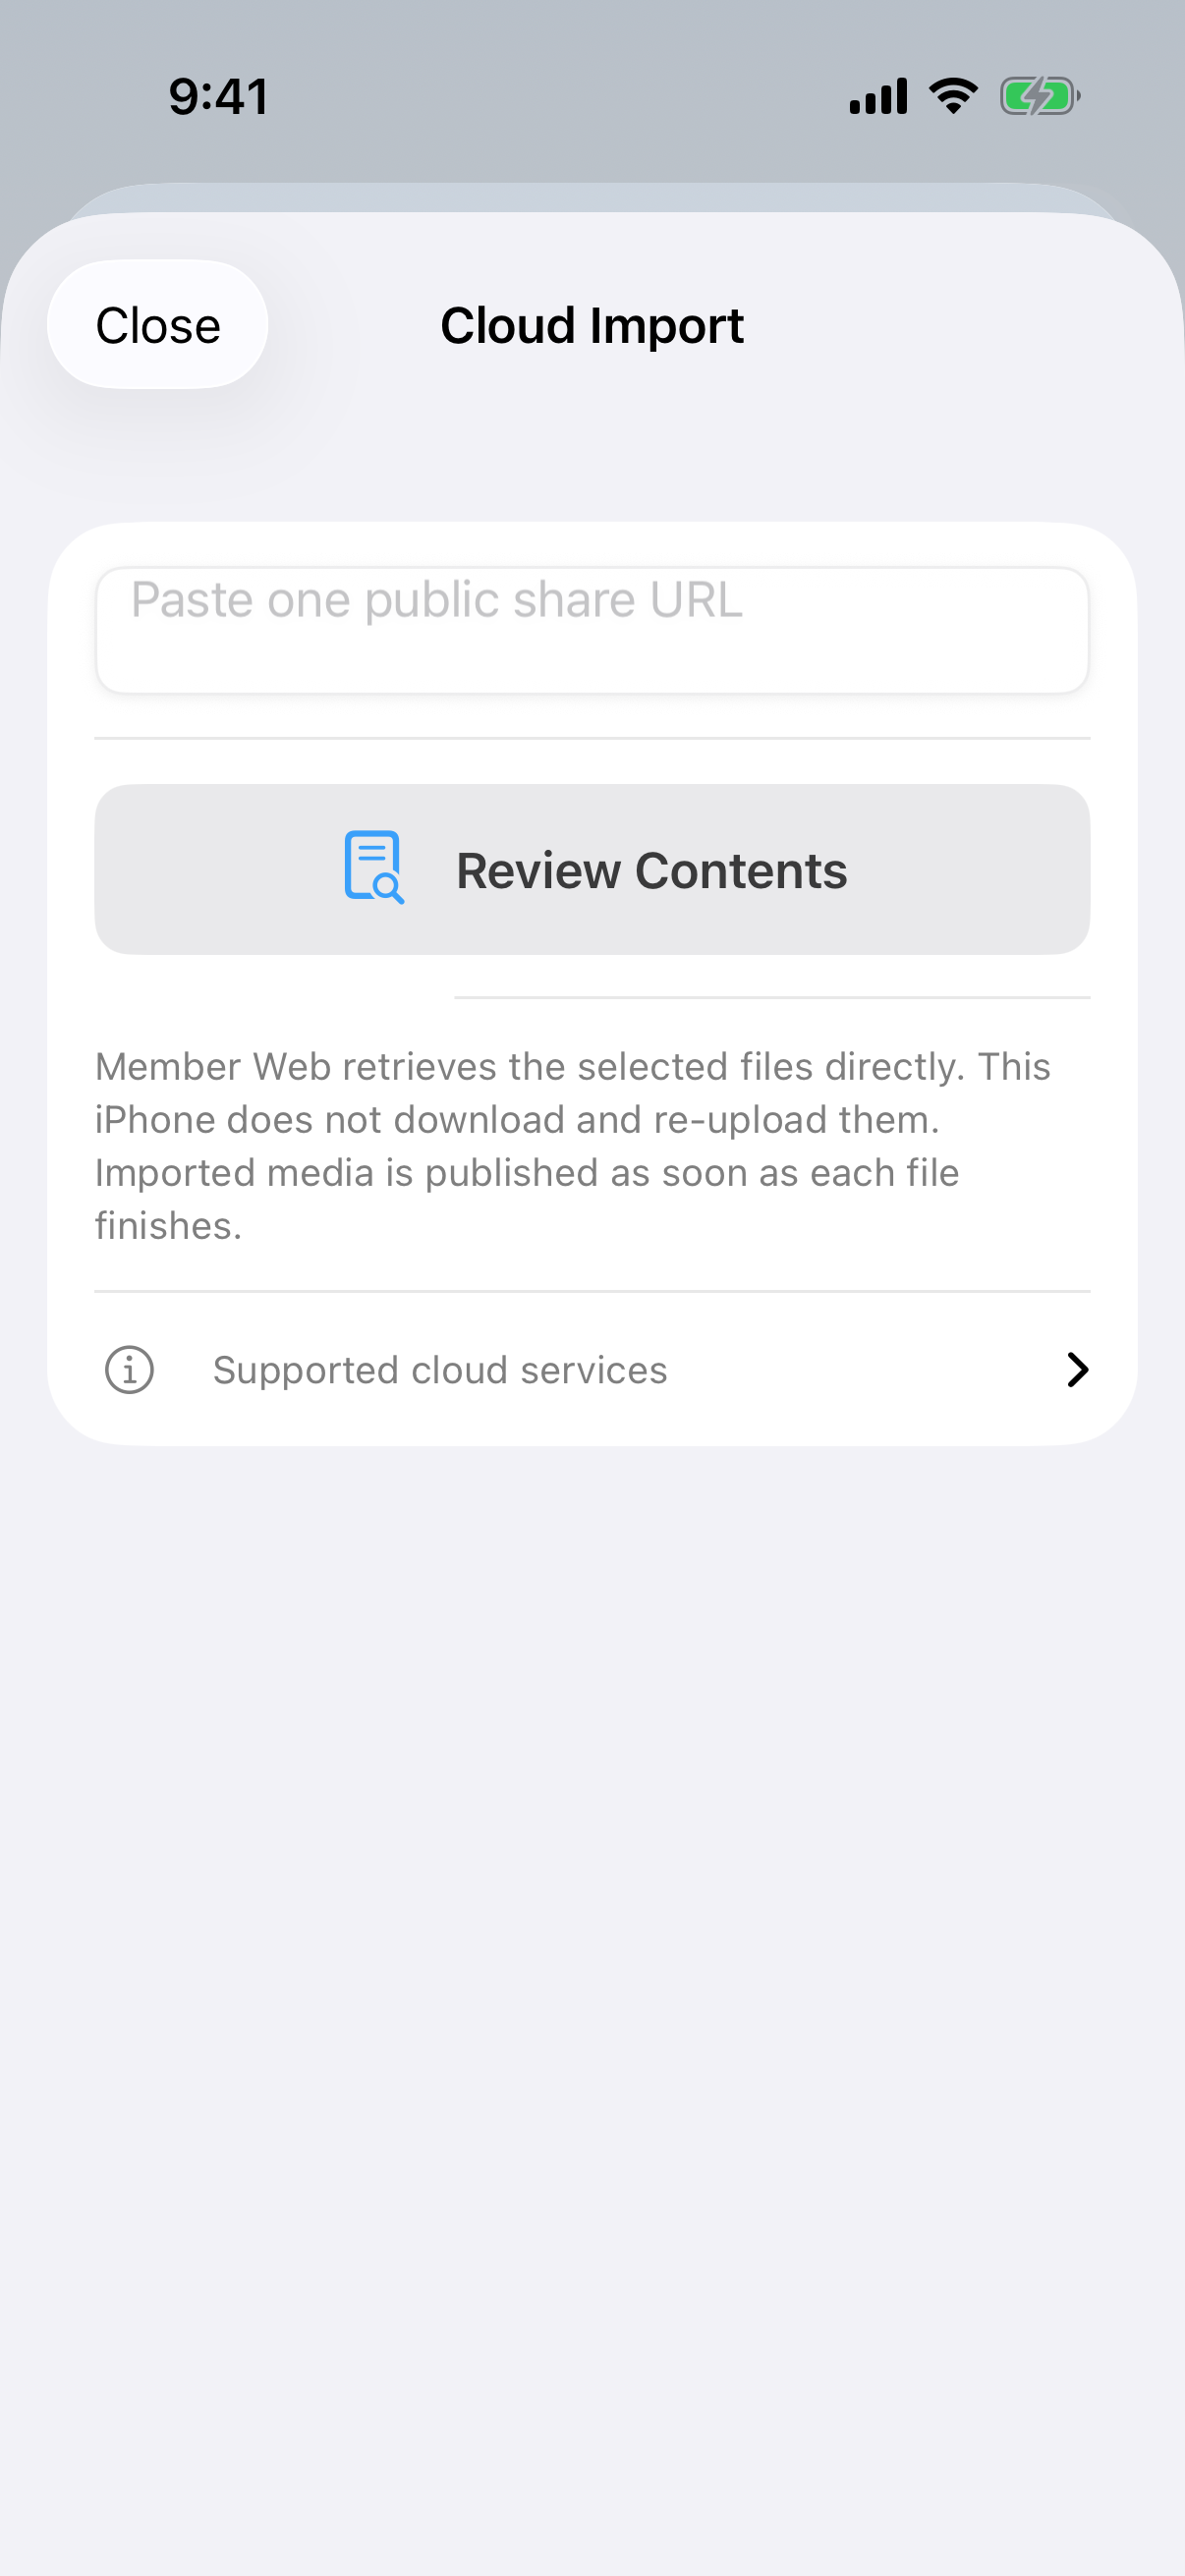
- Tap Import from Cloud Share URL.
- Paste one public share URL that opens without sign-in or a password. Then tap the blue Review Contents button when it becomes enabled.
- The Church server fetches the list and original candidates directly from the cloud. The iPhone does not download and re-upload the whole collection.
- Review the candidates and start only the needed photos or videos. Cloud import supports up to 2,000 items and 10 GiB per file.
Supported services: iCloud Photos, iCloud Shared Albums, OneDrive, Amazon Photos, Dropbox Transfer, and Dropbox shared folders. Configure the service so anyone with the link can open it.
When an older iPhone item has become a reduced copy: If iPhone storage optimization leaves only a smaller local version, selecting from Photos or Files may provide that reduced copy. When the original remains in cloud storage, use a public share URL so the Church server can retrieve it directly. If the share link itself exposes only a derivative, change the cloud service's sharing option so the original can be downloaded.
Identify and retry failures
The app and server retry temporary failures first. A device item that still cannot finish remains in Upload Queue with a thumbnail when available, photo/video type, original file name or a type-qualified selection order, capture time when available, and failure reason. Retry only that item after an upload failure; if reading or preparation failed, choose it again from the source screen. Do not repost the successful part of the batch.
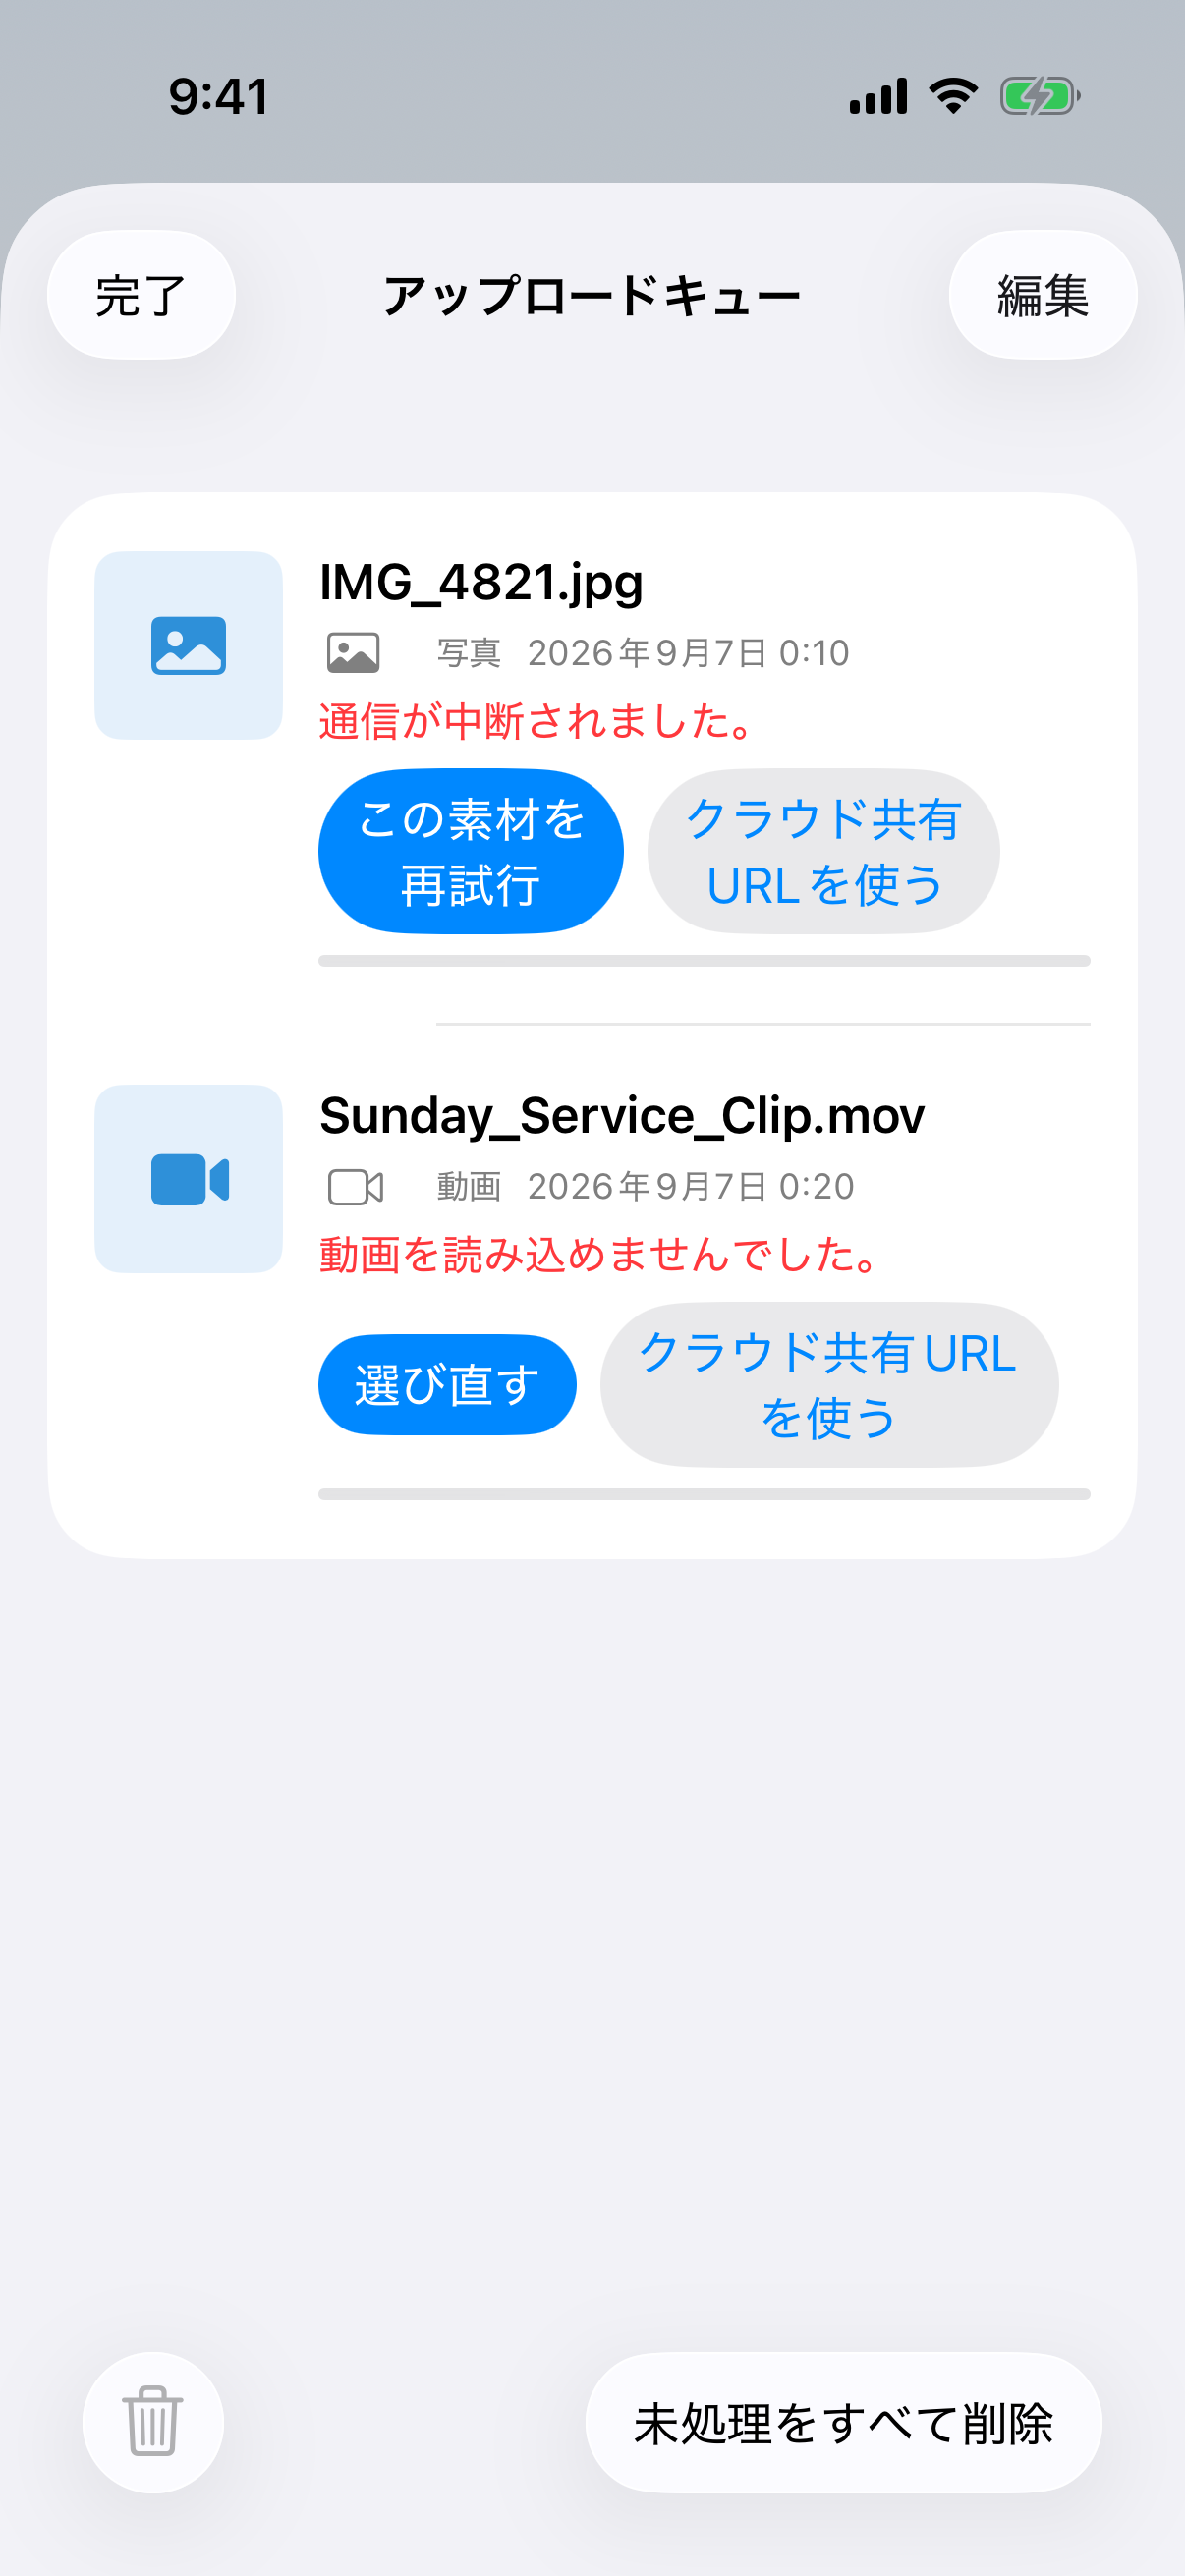
- Connection failureCheck Wi-Fi or cellular data, then tap Retry this item for the named failure. Use stable Wi-Fi for large video. Choose again is only for an item the iPhone could not prepare.
- Cloud retrieval failureCheck link expiration, public access, sign-in, and password requirements. Create a new public link and run Review Contents again.
- From iPhoneSelect up to 500 items at a time. Keep the app open until they enter the queue and check the remaining count.
- Administrator toolsBulk tag editing, rotation, deletion, and photo download-size selection are available.
Before publication: Confirm permission, especially for children, prayer, personal conversations, name badges, addresses, or documents. Use “Privacy Policy / Removal Request” on the upload screen to request removal.